Low-resolution images cost you: 47% of consumers say they won't buy from a site with poor product photos, per survey data from sources like SaleCycle and BigCommerce, and blurry thumbnails get far fewer clicks. You don't need a designer or expensive software—AI image upscaling lets you enhance resolution and quality in seconds, right in the browser. This guide shows you how to upscale image quality online, which tools to use, and how to get the best results every time.
Upscaling image quality online means using a web-based tool (usually AI-powered) to increase an image's pixel dimensions and perceived sharpness without simply stretching pixels. Modern AI upscalers use deep learning (e.g. super-resolution networks) to infer plausible detail, so photos look sharper and more detailed rather than blurry or blocky. You upload a low-res image, choose a scale factor (2×, 4×, or higher), and download a higher-resolution result—all without installing software.

VideoDubber.ai Upscale Dashboard — enhance resolution and quality in seconds.
What This Guide Covers
Whether you're fixing old photos, prepping images for print, or upgrading product shots for e-commerce, this guide answers the questions that matter:
| Question | Where to find it |
|---|---|
| What is AI image upscaling and how does it work? | What Is Image Upscaling (and Why Use It Online)? |
| When should I upscale images online vs. offline? | When to Upscale Images Online |
| How much can I realistically improve image quality? | How Much Can You Improve Image Quality? |
| What's the step-by-step process to upscale an image? | Step-by-Step: How to Upscale Image Quality Online |
| Which file formats and resolutions work best? | Best Formats and Resolutions for Upscaling |
| AI upscaling vs. traditional resize—what's the difference? | AI Upscaling vs. Traditional Resize |
| Which tools are best for upscaling photos online? | Best Tools for Upscaling Images Online |
| How do I avoid blur and artifacts when upscaling? | Best Practices and Common Mistakes |
| Does upscaling work for print and 4K? | Upscaling for Print and 4K |
| Common questions about online image upscaling | Frequently Asked Questions |
What Is Image Upscaling (and Why Use It Online)?
Image upscaling is the process of increasing an image's resolution (width and height in pixels) while trying to preserve or improve perceived sharpness and detail. AI image upscaling uses neural networks trained on millions of high-resolution images to infer missing detail—edges, textures, and fine structures—rather than just interpolating between existing pixels. That's why modern tools can turn a 640×480 photo into a crisp 2560×1920 image that looks genuinely sharper, not just bigger.
Online upscaling means you do this in a browser: upload, process, download. No installs, no GPU required on your side (the work runs in the cloud). It's ideal for one-off fixes, quick product photo upgrades, and teams that need consistent results without buying desktop software like Topaz Gigapixel or Adobe Photoshop.
Why resolution and quality matter
| Use case | Why upscaling helps |
|---|---|
| E-commerce product photos | Marketplaces and themes often require 1000px+ on the longest side; low-res images get rejected or look bad in zoom. |
| Print (posters, merch) | Print needs ~300 DPI at final size; a 1200×800 web image is too small for an 8×10" print. Upscaling can bridge the gap. |
| Social and thumbnails | Platforms compress heavily; starting with a higher-res source keeps thumbnails and feeds sharper. |
| Old photos and archives | Scans and old digital photos are often 1–2 MP; upscaling restores usable detail for sharing and printing. |
| Video thumbnails and stills | A crisp thumbnail improves click-through; upscaling a frame or low-res asset is a fast win. |
When to Upscale Images Online
Online upscaling fits best when you need speed, no install, and good-enough quality for web, social, or light print. Use it for:
- Single images or small batches — upload a few photos, get them back in minutes.
- Any device — phone, tablet, or work laptop; no desktop app required.
- Quick experiments — testing how a logo or graphic looks at 2× or 4× before committing to a full workflow.
- Integrating with other online tools — e.g. upscale an image, then use it in face swap or video production workflows.
Choose desktop or dedicated software (e.g. Topaz Gigapixel, Adobe Super Resolution) when you have hundreds of images, need maximum quality for fine-art print, or require batch automation and local processing for privacy.
How Much Can You Improve Image Quality?
You can't recover detail that was never captured—AI upscaling adds plausible detail, not true optical resolution. In practice:
- 2× upscaling (e.g. 800×600 → 1600×1200) usually looks very good; most AI upscalers handle this well with minimal artifacts.
- 4× upscaling (e.g. 640×480 → 2560×1920) is common and often looks sharp for web and casual print; quality depends on source sharpness and the tool.
- 8× and beyond is possible but diminishing returns; you may see smoothing or invented texture. Best for very small thumbnails or icons, not for critical fine-art reproduction.
Rough rule of thumb: start from the cleanest, highest-resolution source you have. A slightly soft 2 MP photo can become a decent 8 MP image for web; a heavily compressed 200×200 JPEG will never become a perfect 4K image—but it can still look much better than a simple resize.
Step-by-Step: How to Upscale Image Quality Online
Follow these steps to upscale image quality online with a typical AI upscaler (we use VideoDubber as the example; the flow is similar across tools).
Step 1: Choose your tool and open the upscale interface
Pick an AI image upscaler that supports your format and scale factor (2× or 4× is typical). Open the tool in your browser and go to the Upscale or Enhance section. For example, on VideoDubber, select Upscale from the tools menu to open the enhancement interface.
Select "Upscale" to access the enhancement interface.
Step 2: Upload your image
Upload the file you want to enhance. Most online upscalers accept JPG, PNG, and WEBP; some support BMP or TIFF. Keep file size within the tool's limit (often 5–20 MB). If your image is huge, consider a slight downscale first so upload and processing stay fast—then upscale the result if needed.
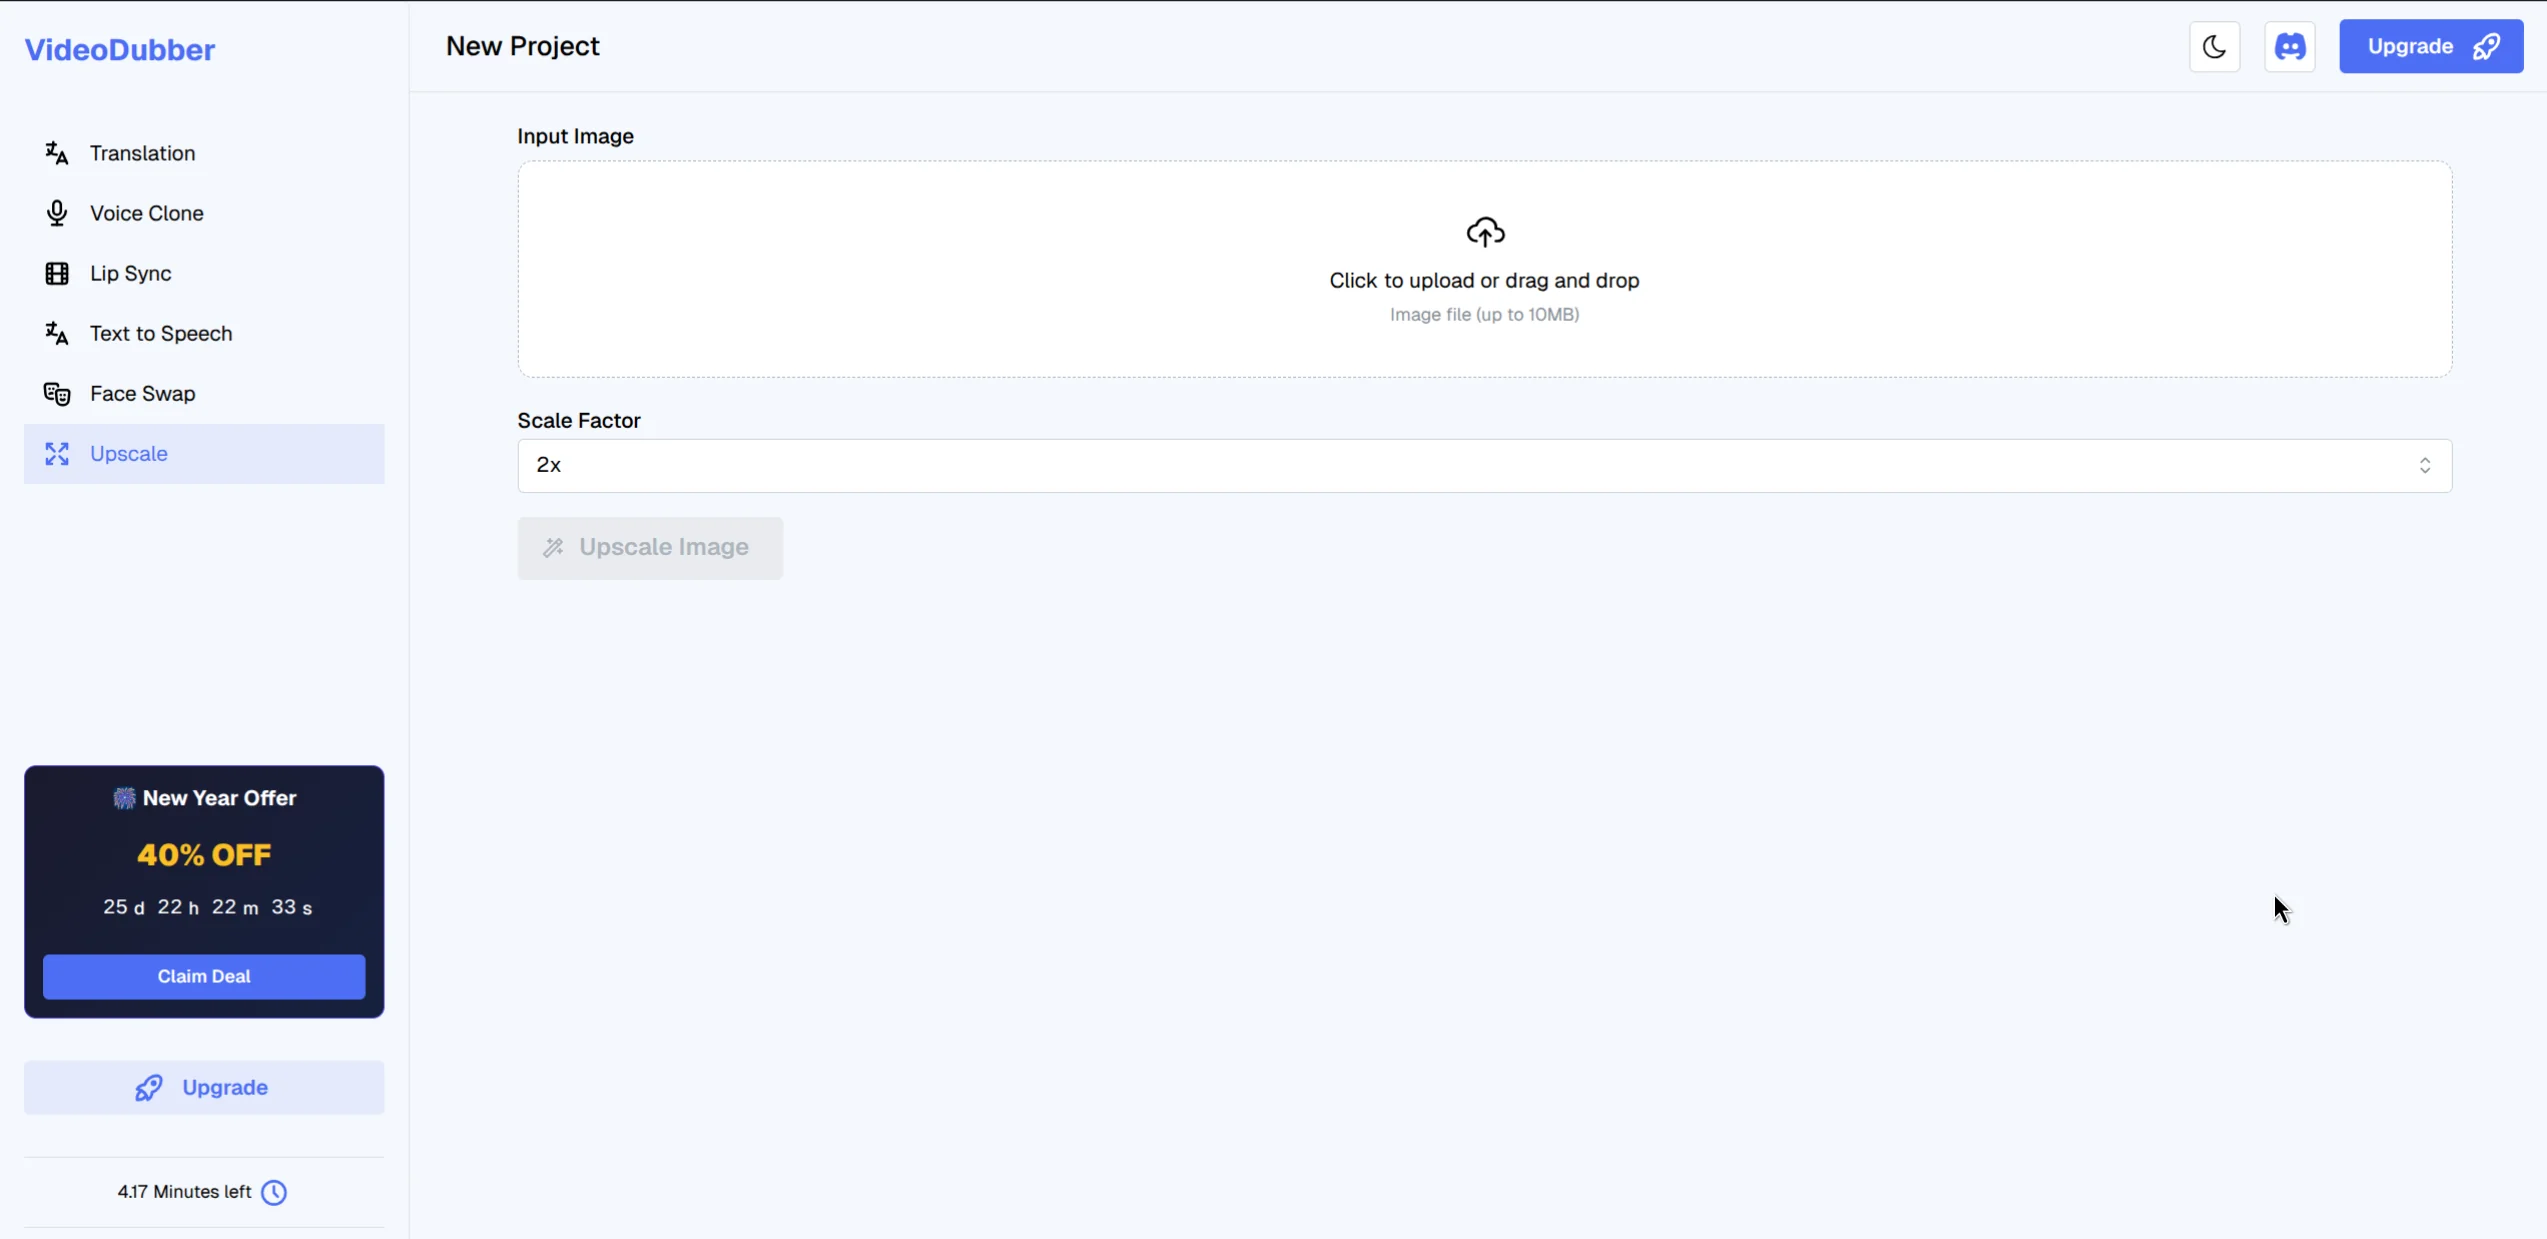
Upload your low-resolution image to the platform.
Step 3: Pick scale factor and options (if available)
Many tools offer 2× or 4×; some add face enhancement or denoise options. For general photos, 2× or 4× is enough. For very small images (e.g. under 500px), start with 4×; for already-large images, 2× often preserves the best balance of detail and natural look.
Step 4: Generate and download the upscaled image
Click Generate or Upscale to start processing. The AI analyzes and enhances the image (usually 10–60 seconds). When done, preview the result, then download the high-resolution file. Keep the original as backup.
Watch as the AI enhances the visual quality of your photo.
Quick reference: steps at a glance
| Step | Action |
|---|---|
| 1 | Open the upscale tool in your browser (e.g. VideoDubber → Upscale). |
| 2 | Upload your image (JPG, PNG, or WEBP). |
| 3 | Choose scale factor (2× or 4×) and any extra options. |
| 4 | Click Generate/Upscale and wait for processing. |
| 5 | Preview, then download the high-resolution result. |
Best Formats and Resolutions for Upscaling
Best formats: PNG (lossless) or high-quality JPG (90%+). PNG avoids compression artifacts that upscalers can exaggerate. WEBP is fine if the tool supports it and quality is set high.
Resolution: Higher is better. A 1200×800 source will upscale more convincingly than a 400×300 one. If you have a choice, always start from the largest, least-compressed version of the image. Avoid upscaling already heavily compressed thumbnails when you can get the same image at a higher resolution from the original source.
| Source quality | Realistic outcome (4× AI upscale) |
|---|---|
| Clean, sharp 1–2 MP | Very good 4–8 MP for web and light print |
| Slightly soft 2–5 MP | Good 8–20 MP for web and social |
| Heavily compressed or very small | Noticeably better than resize, but not "perfect" |
AI Upscaling vs. Traditional Resize
Traditional resize (e.g. bicubic or bilinear interpolation in Photoshop or GIMP) only redistributes existing pixels—it doesn't add real detail. Enlarging 100% → 200% with bicubic interpolation makes the image bigger but blurrier.
AI upscaling uses deep learning (e.g. models inspired by Real-ESRGAN or similar super-resolution research) to predict plausible texture and edges. The result is a higher-resolution image that looks sharper because the model has seen similar patterns in training data. You get more pixels and better perceived quality.
| Method | How it works | Best for |
|---|---|---|
| Bilinear/bicubic resize | Math between neighboring pixels | Quick previews only |
| AI super-resolution | Neural network infers detail | Web, social, light print, product photos |
| Adobe Super Resolution / Topaz | Advanced AI, often local/desktop | Max quality, batch, fine-art print |
For upscaling image quality online, AI-based tools are the default choice; simple resize is not enough if you care about sharpness.
Best Tools for Upscaling Images Online
| Tool | Scale | Formats | Best for |
|---|---|---|---|
| VideoDubber Upscale | 2×, 4× | JPG, PNG, WEBP | Quick enhancement, no signup for try; part of video/localization workflow |
| Upscayl (open-source) | 2×–4× | Common raster | Free, local or self-hosted; privacy-focused |
| Bigjpg | 2×–4× | JPG, PNG | Anime/illustration; good for artwork |
| Let's Enhance | Up to 4× | JPG, PNG | API and batch; paid tiers |
| Adobe Express | 2× (Super Resolution) | JPG, PNG | Adobe ecosystem users |
Verdict: For general photos and product images when you want a fast, no-install option, VideoDubber's Upscale tool is a strong choice—upload, pick 2× or 4×, and download. For illustration or anime, try Bigjpg or similar; for batch or API, look at Let's Enhance or Adobe Express.
Tools like VideoDubber use AI to turn low-resolution images into crisp, high-definition assets in seconds, which is especially useful when you're also editing or localizing video and want a single place for editing translated videos and enhancing thumbnails or stills.
Best Practices and Common Mistakes
Do
- Start from the best source you have — less compression and higher resolution in = better out.
- Use PNG or high-quality JPG when possible.
- Preview before replacing — keep the original; compare at 100% zoom.
- Match scale to need — 2× for modest improvement, 4× for small images or web/display.
- Check faces and text — some upscalers have a "face" or "document" mode; use it when relevant.
Don't
- Don't upscale multiple times in a row (e.g. 2× then 2× again)—artifacts compound; do one 4× pass if you need 4×.
- Don't expect 8× from a 100×100 icon to look like a real photo—set realistic expectations.
- Don't rely on upscaling as a substitute for capturing at proper resolution when you can control the source (e.g. product photography).
How to avoid blur and artifacts
- Use a tool that uses neural super-resolution (AI), not simple interpolation.
- Denoise before upscaling if the image is very noisy—some tools offer denoise + upscale.
- For text or UI, try a tool with a "sharp" or "document" preset if available; generic "photo" mode can over-soften text.
Upscaling for Print and 4K
Print: Print typically needs ~300 DPI at final size—a standard cited by print labs and industry guides (e.g. Printful, GIMP documentation). For an 8×10" print, that's 2400×3000 pixels. If your image is 1200×1500, a 2× AI upscale gets you there; many printers and labs accept 240–300 DPI. Results vary by paper and viewing distance; for critical fine-art work, capture or scan at target resolution when possible.
4K (3840×2160): A 1920×1080 image upscaled 2× reaches 4K resolution. AI upscaling is commonly used to upscale 1080p to 4K for displays and video; the same logic applies to stills—a 2 MP photo upscaled 4× can fill a 4K screen and look acceptable for casual use.
| Target | Minimum source (approx.) for 2× upscale | For 4× upscale |
|---|---|---|
| 1080p (1920×1080) | 960×540 | 480×270 |
| 4K (3840×2160) | 1920×1080 | 960×540 |
| 8×10" at 300 DPI | 1200×1500 | 600×750 |
Frequently Asked Questions
What is the best way to upscale an image without losing quality?
The best way to upscale an image without losing quality (and often gaining perceived sharpness) is to use an AI image upscaler rather than a simple resize. AI tools infer detail and edges, so the result looks sharper than bicubic or bilinear enlargement. Use PNG or high-quality JPG, pick 2× or 4×, and avoid upscaling the same image repeatedly.
Can you increase the resolution of an image for free online?
Yes. Several free online image upscalers offer 2× or 4× AI upscaling with a few images per day or no signup—e.g. VideoDubber's Upscale tool, Bigjpg (with limits), and Upscayl (open-source, run locally). For unlimited or batch use, paid plans or desktop software are usually required.
How does AI image upscaling work?
AI image upscaling uses deep neural networks (e.g. super-resolution models like Real-ESRGAN) trained on pairs of low- and high-resolution images. The model learns to predict plausible high-frequency detail—edges, textures—so when you feed a low-res image, it outputs a higher-resolution version that looks sharper and more natural than a simple interpolation.
Is it better to upscale in Photoshop or use an online AI upscaler?
For single images and speed, an online AI upscaler is often faster and requires no subscription—upload, process, download. Photoshop (with Super Resolution in Camera Raw) or Topaz Gigapixel is better when you need maximum quality, batch processing, or local control and already have the software. For most web and product-photo use cases, a good online AI upscaler is sufficient.
What resolution do I need to upscale for print?
For print at 300 DPI, multiply the print dimensions in inches by 300. Example: 8×10" = 2400×3000 pixels. If your image is smaller, use AI upscaling to reach that size—e.g. 1200×1500 upscaled 2× gives 2400×3000. Many labs accept 240 DPI for large-format or viewing-distance prints.
Does upscaling reduce image quality?
Simple resizing (e.g. bicubic) reduces perceived quality when enlarging—the image gets blurrier. AI upscaling is designed to improve perceived quality by adding inferred detail; it can introduce slight smoothing or artifacts in some areas, but overall the result is usually sharper and more usable than a non-AI resize. Quality loss from compression is separate—save the upscaled result as PNG or high-quality JPG to avoid re-compression loss.
Can I upscale an image to 4K?
Yes. To reach 4K (3840×2160) from a 1920×1080 image, use 2× AI upscaling. From 960×540, use 4×. Online AI upscalers like VideoDubber support 2× and 4×; for a 1080p source, 2× is the right choice and typically produces a clean 4K image for display or video.
What file format is best for upscaled images?
PNG is best for preserving quality with no loss when saving the upscaled result. High-quality JPG (90% or higher) is fine for web and many prints and keeps file size smaller. Use TIFF only if your workflow requires it (e.g. print prep). Avoid saving as a low-quality JPG after upscaling—that re-introduces compression artifacts.
Summary: Upscale Image Quality Online the Right Way
- Upscaling image quality online means using a web-based AI tool to increase resolution and sharpness—no install, any device.
- AI upscaling adds inferred detail (edges, texture) and usually looks much better than a simple resize; use 2× or 4× for most cases.
- Best results come from a clean source (PNG or high-quality JPG), one upscale pass, and a tool that uses neural super-resolution.
- Use it for product photos, old photos, social/thumbnails, and light print; for 4K, 2× from 1080p is standard.
- VideoDubber's Upscale tool lets you enhance images in seconds (JPG, PNG, WEBP; 2×/4×)—ideal for quick fixes and workflows that also use video editing or text-to-speech.
Don't let low resolution hold your visuals back. Upload, upscale, and download—then use the sharper asset everywhere it matters.
Further Reading
How to Edit Translated Videos Online: Complete Editing Guide
Complete guide to editing translated videos on VideoDubber.ai. Learn how to edit subtitles, fix translations, adjust timestamps, and change voice settings with unlimited free edits.
How to Translate Videos to Multiple Languages: Complete Step-by-Step Guide
Learn how to translate videos into 150+ languages using VideoDubber.ai. Complete step-by-step guide with voice cloning, lip-sync, and professional-quality dubbing.
How to Swap Faces Online: Complete Step-by-Step Guide [2026]
How to swap faces online: complete step-by-step guide with tool comparison and ethics. Swap faces in video or images with VideoDubber in minutes—no install. Consent and best practices inside.
Best Video Translator in 2024: My Honest Experience with the Top 10 Tools
Dive into my hands-on experience with the top 10 video translators of 2024. From speed and language options to usability, discover which tools truly deliver and why VideoDubber.ai stands out.
Best SRT Translators for Video Translation in 2024
Explore the best SRT translators for video translation in 2024. Discover tools that help convert subtitles into multiple languages and learn how video dubbing solutions can elevate your content for global audiences.